

I have been asked a lot lately on how we insert zippers into our bags. We have found this method to be easy and it gives a nice tidy result. Let's start with the measurements. Measure the top of your bag. We are going to trim the zipper, so it is 8cm (3”) longer than the width of the bag lining.
 |

|

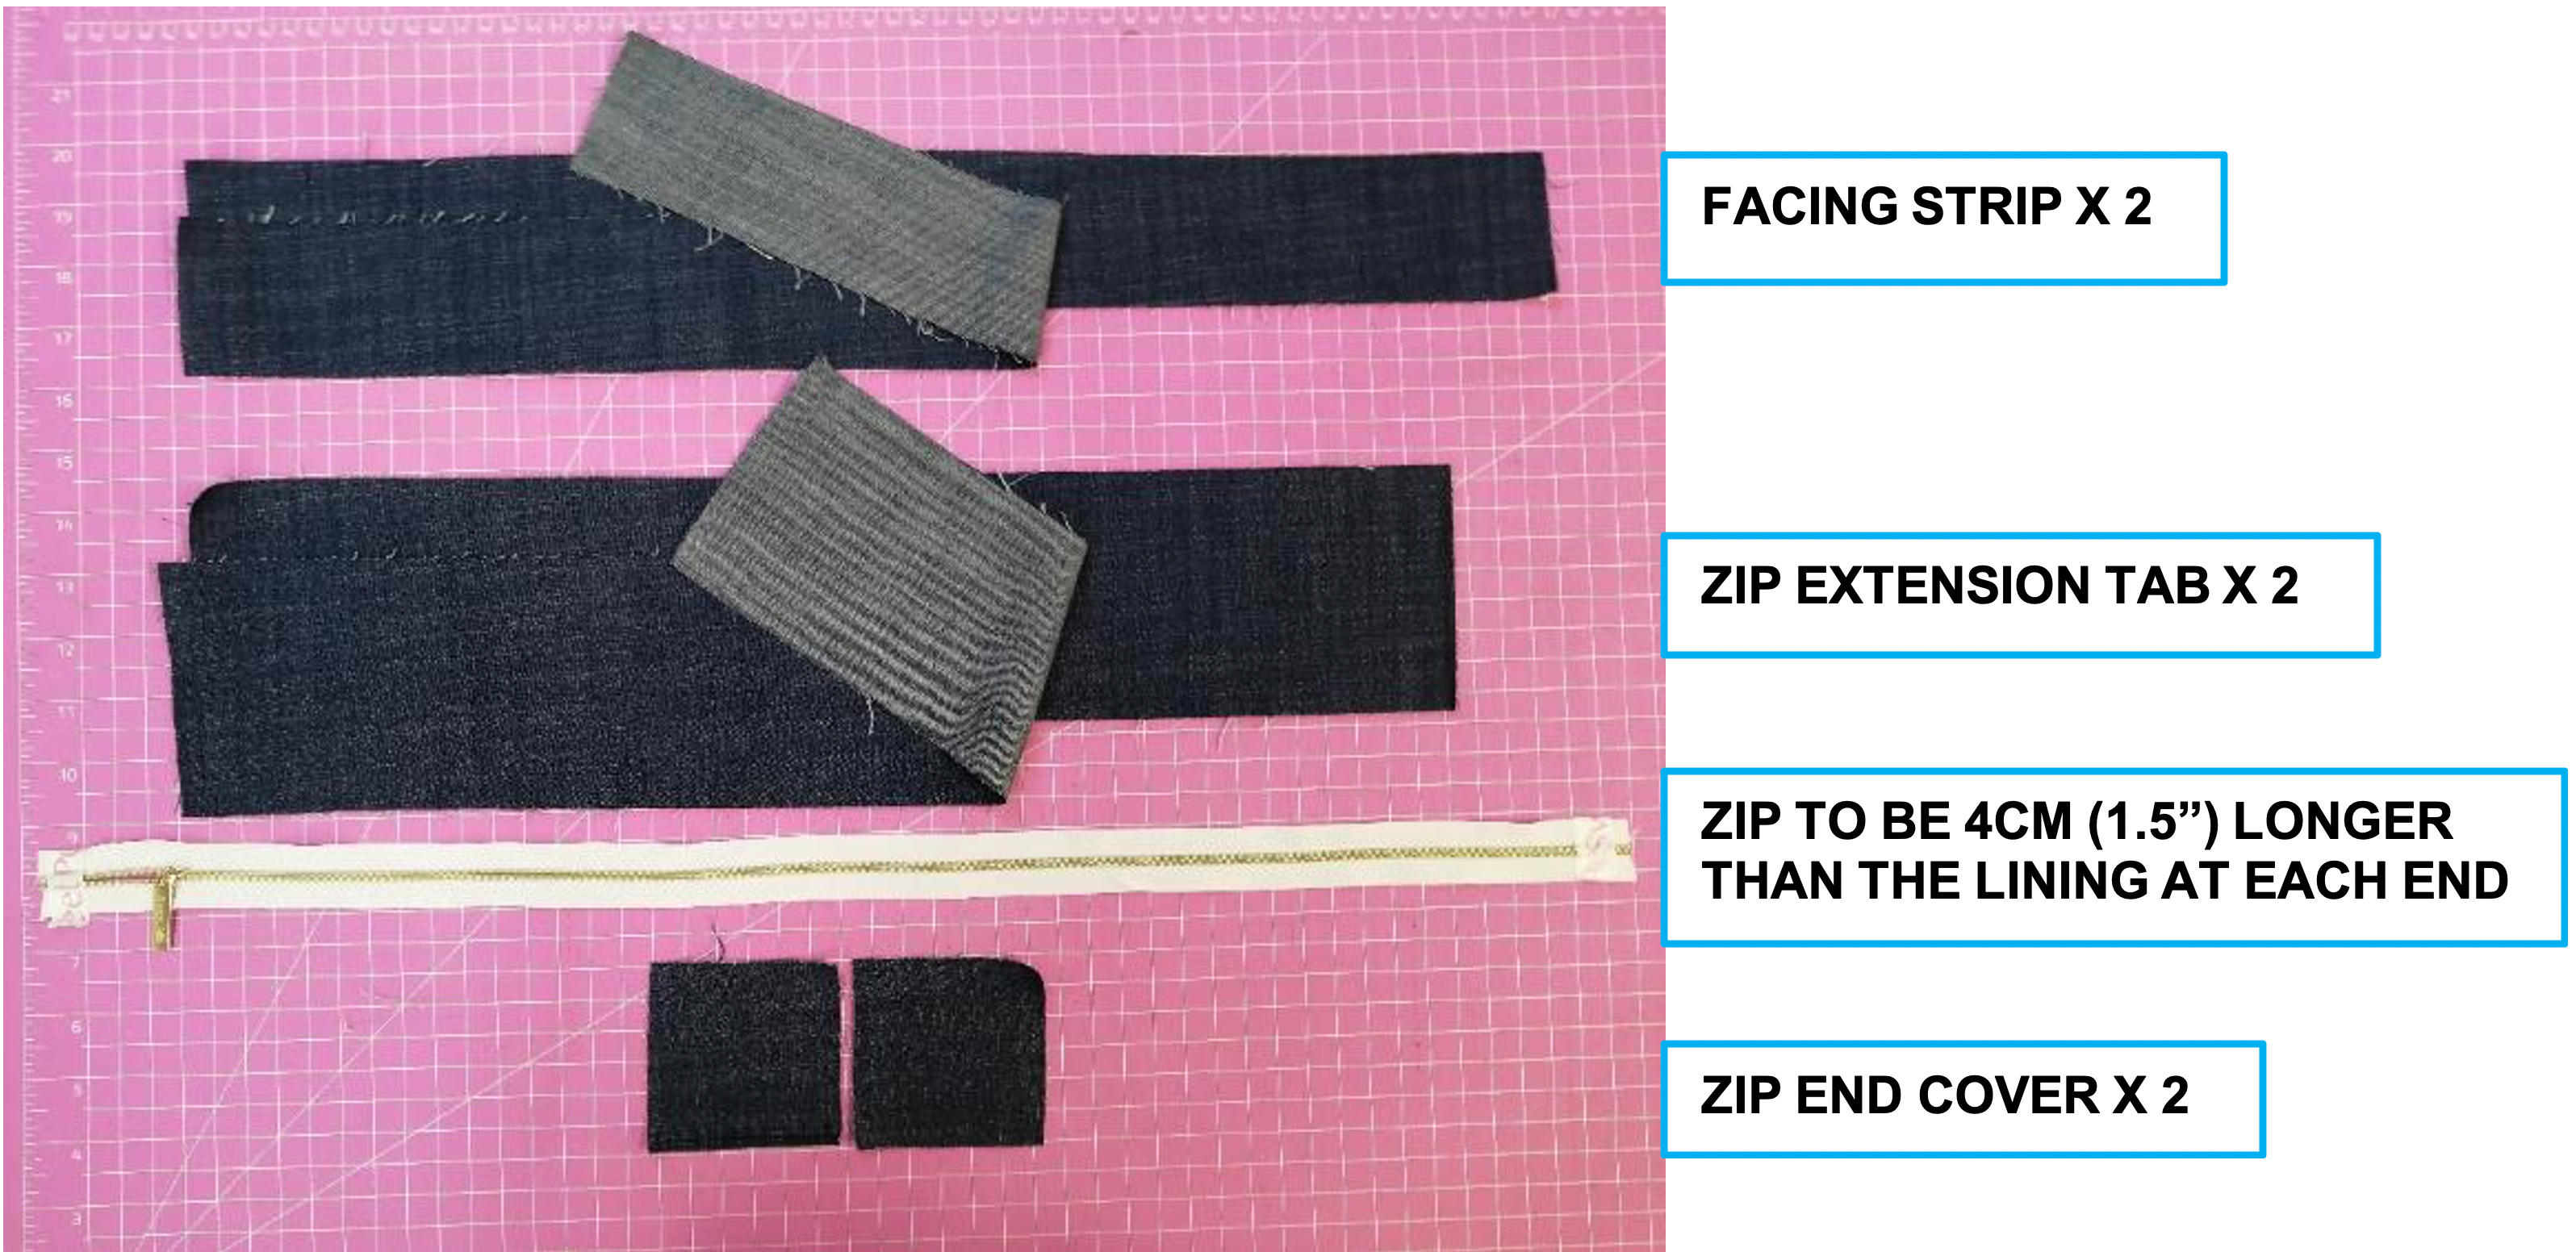
You will need fabric cut as shown below:
- 2 x zip end covers 9cm x 9cm (3 ½” x 3 ½”) or three times the width of the zip when closed.
- 2 x facing strips for the top of the lining. Cut these the width of the lining x 6.5 cm (2 ½”).
- 2 x zip extension tabs 3” shorter than the width of the bag lining x 10cm (4”).
The fabrics for this closure can either match the lining or be a contrast, to match the bag. Make sure you have a pair of each fabric shapes cut. The zip has been trimmed and we zig-zagged the ends to prevent the zip puller from falling off.
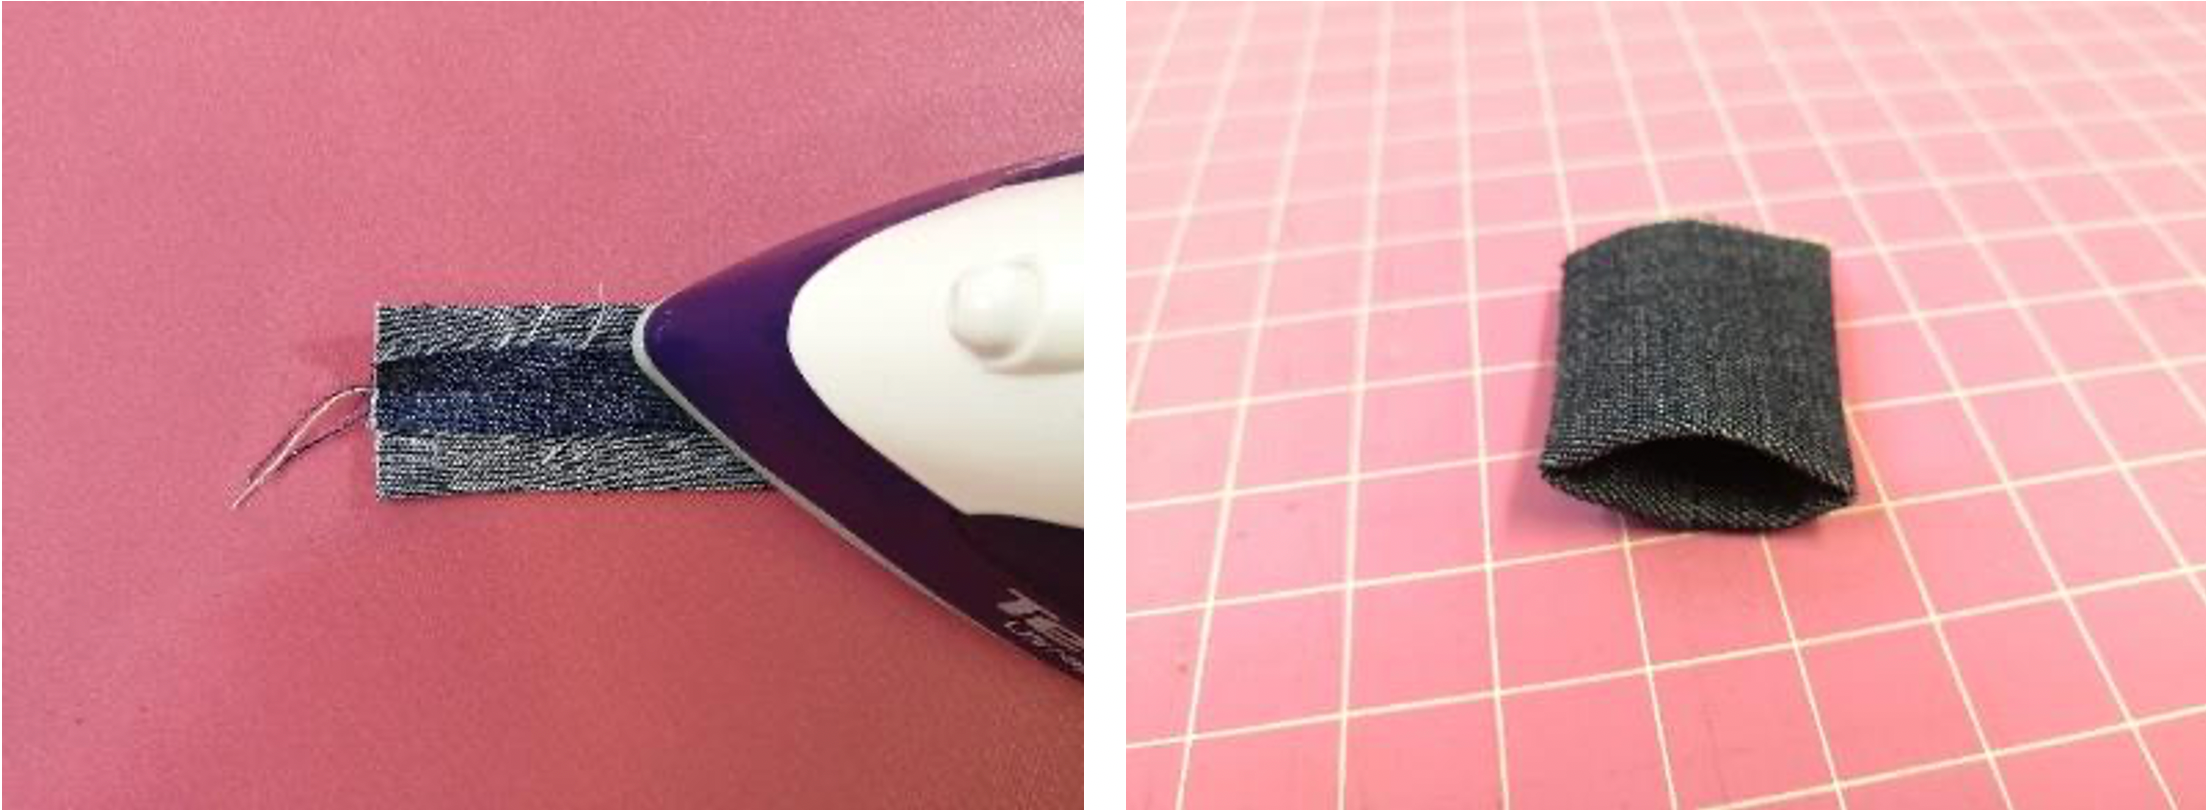
1. Fold a single piece of the “zip end cover” fabric, widthways (right sides together) and stitch in from the edge, ¼”.

2. Press the seam open. Make a tube turning the fabric inside out, halfway (right side of the fabric to the outside).
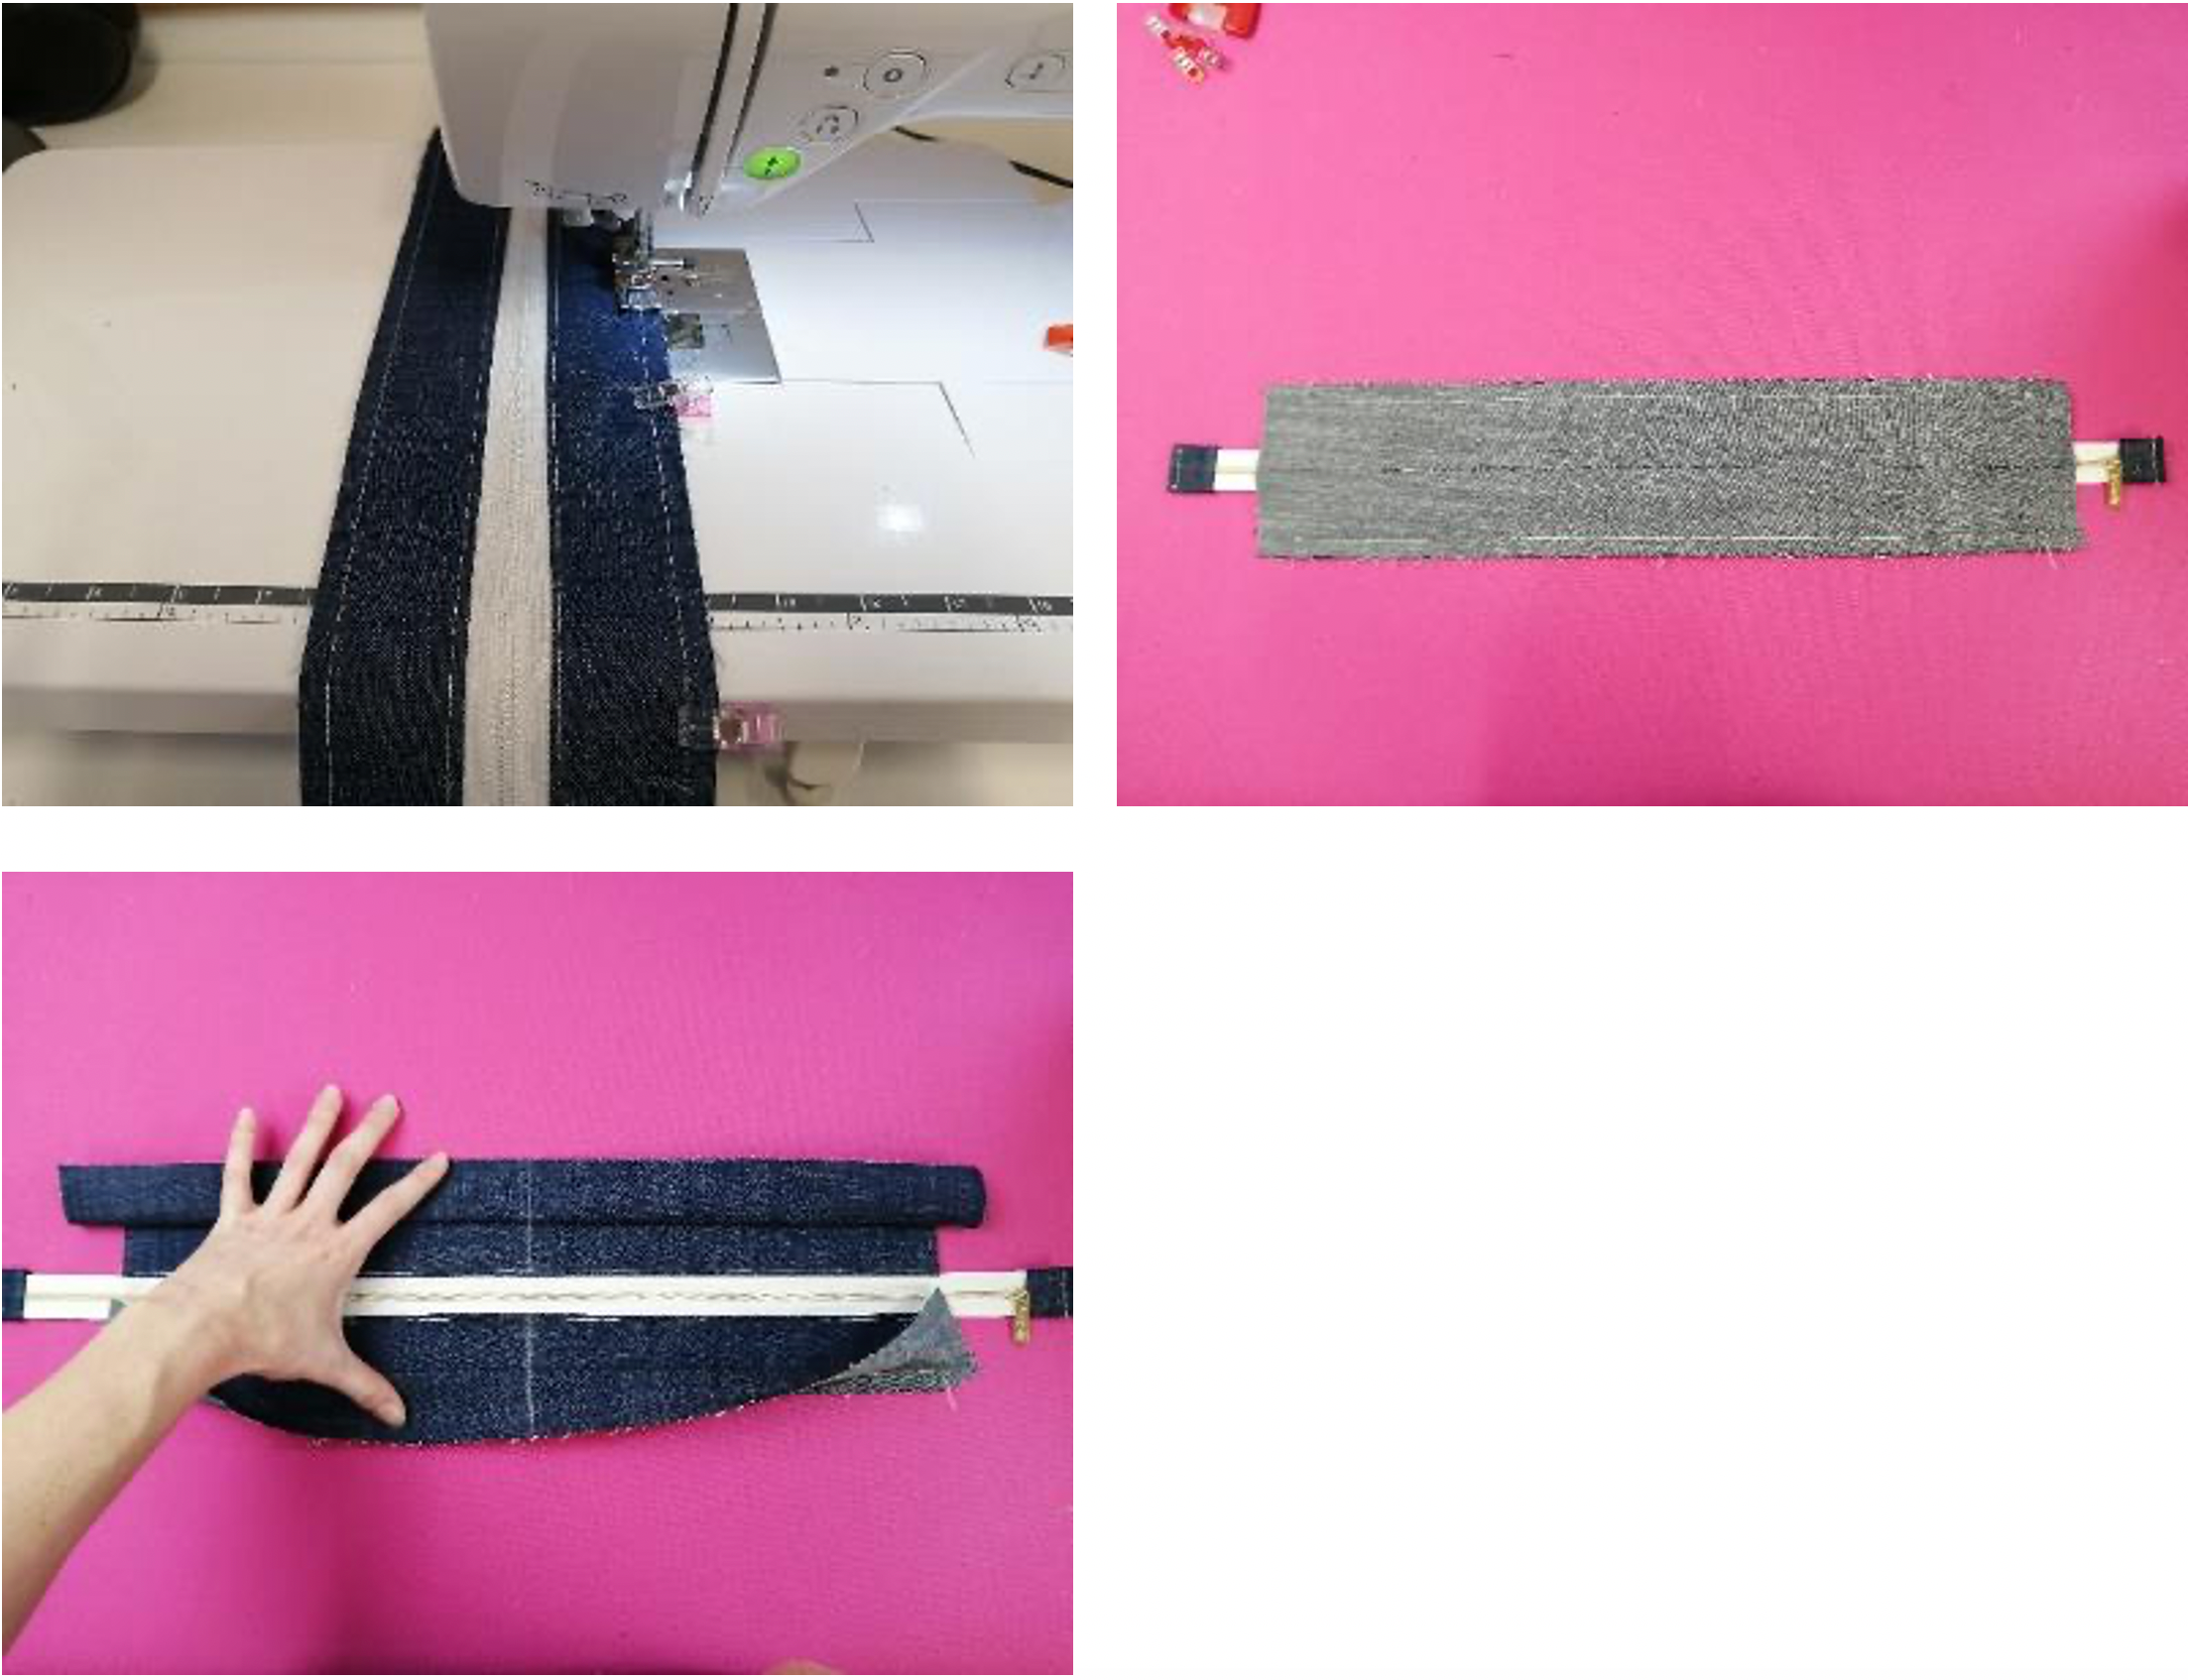
 3. Slide the folded edge of the half tube onto one end of the zip (the seam should be on the underside), leaving 5/8” (1.5cm) of zip showing. Stitch, though all layers, a presser foot width from the raw edge of the tube (zip end cover).

4. Roll the folded edge of the tube fabric down to the end of the zip, until the zip tape is covered. Edgestitch the end of the tab end. OPTIONAL – stitch around all edges to form the square zip end cover. Press lightly. (Repeat for the other end of the zip).

5. Prepare the zip extension tab by pressing each end in ½” (1.25cm).
 6. Now press this strip widthways, right sides together. It is important to find the middle of the zip (length) and the middle of the zip extension tab strip.
 7. Sandwich the zip inside the pressed strip, ensuring the zip is tucked up to the fold of the fabric. There should be an even amount of zip tape hanging out from each end. Make sure the zipper is closed and the zipper pull is at the zip end cover.

8. Stitch between 1/8" to 3/8” (3-10mm) in from the folded edge (the size of the seam will depend on how much zip tape you want to see when completed).
 9. Press all the seams away from the stitching line. Complete the steps for the remaining side.
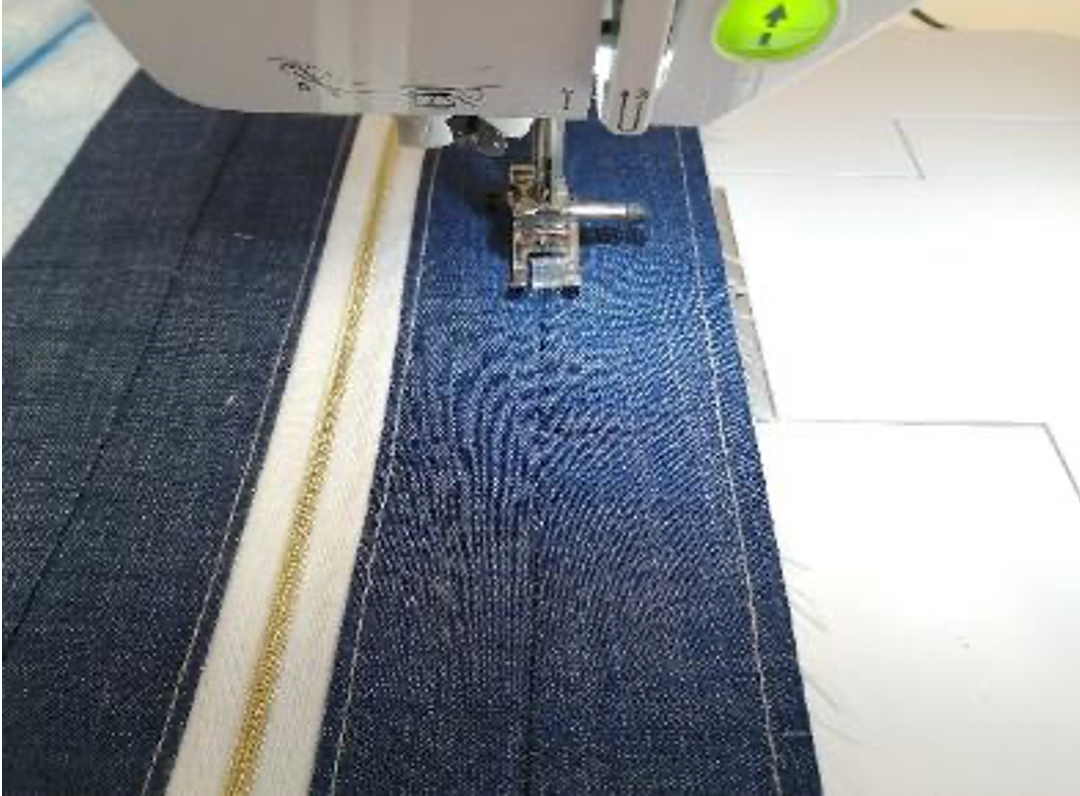
 10. Edge stitch along all edges to help secure. The yellow lines signify the areas in which should be stitched.

11. Find the centre points of both the zip extension tabs and the tote bag facing strips. With the right side of the zip facing up, lay a facing strip on top (right sides together). Pin or use quilt clips to keep the seam in place.

12. Stitch this seam with a ½” (1.25cm) seam allowance. Repeat on the other side.
 13. Press these seams flat (out to the ends) with the seams closed and the bulk facing the tote bag facing strip.

14. Lay the bag facing onto the right side of the tote bag lining. Ensure the seam holding the zip extension tab is tucked up into the facing. Pin or clip the facing strip to the top edge of the lining. Stitch all edges 1/4” (6mm) in from the edge (like topstitching).

15. Stitch in the ditch along the zip extension seam for extra strength.
16. Repeat for the other side of your lining.

17. The underside of the zipper shows the zip extension being stitched into the facing seam. Since you have chosen to not add a zipper, start from here. Place the right sides together of the lining and pin/quilt clip all sides and stitch the lining together with a ½” seam allowance (leaving a 7” (18cm) gap) at the base to turn through.

18. Repeat the boxing of your corners the same as on the outside of your bag.

19. Attach any straps, tab, or handles to the outer bag with a stay stitch.

20. Open your zipper lining and turn right sides out.

21. Turn the tote bag wrong way out.

22. Place lining on the inside of your bag. You will have the right sides together. Attach the lining to the bag at the top edge using clips. Stitch with a 1/2” seam on the wrong side of the bag (stitching on the wrong side of the bag means you can make sure you are stitching inside the border line on the front of the bag, so this line of sewing does not show on the front of the bag).

23. Turn though the gap left at the base of the lining.

24. Push the lining down into the bag and iron the seam around the top of the bag. Have the zipper closed to make it easier if you added one to your bag.

25. Topstitch around the top of the bag to keep it flat. Make sure the loops/straps are facing outside the bag while topstitching. Pin the opening of the lining closed. Stitch the seam on your sewing machine.

Your beautiful bag is finished!
4 comments
Geraldine roach
I wish you had a video on this,I find it much easier learning if I can see someone doing it,sure I’m not the only one
Sherral
Thankyou, I’m going to try putting a zip into my quilted patchwork bag I’m currently making 😊
Judy Cox
Fabulous …Thank You ! I’m a very visual learner .
Margaret
Thank you for the detailed instructions. I recently made a bag and misunderstood how the zip ends were done so this was very helpful Thanks again